
Quick answer: the top-to-bottom order
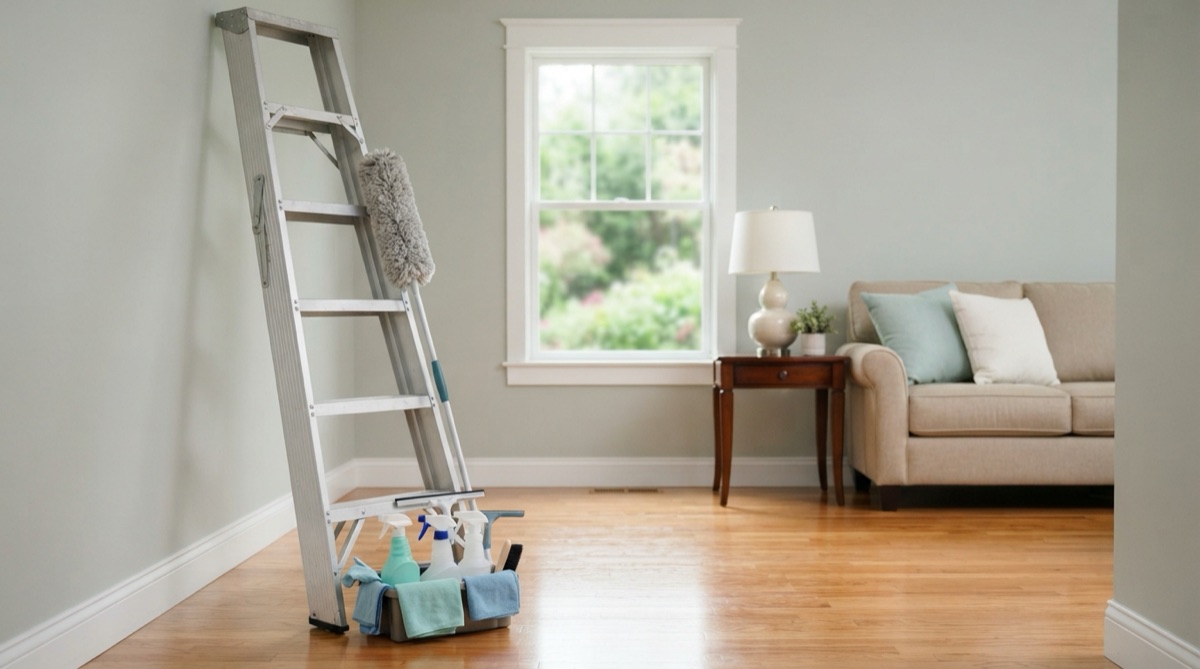
To deep clean a house, work top to bottom, dry to wet, and room by room — clear clutter, remove high dust, wash surfaces, scrub kitchens and baths, refresh soft items, then clean floors last. A deep clean house plan saves time because dust and drips do not land on finished work. Use this checklist to reset your home yourself or decide when to book deep cleaning.
Key takeaways
- Clean first, then disinfect only when needed. A 2025 CDC home-cleaning page says disinfecting is usually for illness, high-risk homes, or certain food-contact messes.
- Work high to low: vents, fans, shelves, counters, fixtures, baseboards, then floors.
- Keep the house dry. EPA’s 2026 mold guide says wet materials should be dried within 24-48 hours, and indoor humidity should stay below 60%, ideally 30-50%.
- Use separate cloths for kitchens, bathrooms, glass, and general dust so residue does not travel room to room.
- Save floors for the end; they collect everything the other steps knock loose.
- For a full home reset, plan one pass for dry soil and one pass for wet cleaning. Trying to scrub dust usually makes mud.
What makes deep cleaning different?
Regular cleaning keeps a home livable. Deep cleaning removes the buildup that hides under, behind, above, and around the things you touch every day.
A normal clean may wipe counters, vacuum open floors, clean toilets, and take out trash. A deep cleaning checklist adds the edges: baseboards, cabinet fronts, vent covers, light fixtures, door frames, appliance seals, grout lines, window tracks, and floor corners.
The biggest difference is order. Deep cleaning is slower because you move items, loosen dry soil, clean details, and let wet areas dry before putting things back.
A quick way to sort the two: if you can see the dirt only after moving a chair, opening a drawer, or looking up, it belongs in the deep clean.
Gather supplies before you start
You do not need a cart full of harsh products. You need the right tools, clean cloths, and enough time for surfaces to dry.
For eco-minded products, the federal Safer Choice label means the formula passed review for ingredients, performance, pH, packaging, and VOC limits. Elite House Cleaning uses eco-friendly non-toxic products as our standard, but every home still needs product labels followed by surface type.
| Supply | Use it for | Skip it when |
|---|---|---|
| Microfiber cloths | Dusting, wiping, drying, polishing | The cloth is already greasy or gritty |
| Vacuum with brush and crevice tools | Vents, baseboards, furniture edges, tracks | Wet messes or broken glass |
| Mild dish soap | Grease, counters, cabinet fronts, painted trim | Natural stone if the label says otherwise |
| pH-neutral floor cleaner | Hardwood, laminate, sealed floors | Unsealed wood or unknown finishes |
| Nylon detail brush | Faucet bases, grout edges, hinges, tracks | Delicate finishes that scratch |
| Squeegee or dry towel | Shower glass, mirrors, wet tile | Rough tile that snags cloth |
| Gloves and eye protection | Bathrooms, ovens, moldy spots, disinfectants | Never skip them with strong products |
Keep one rule: clean with the least aggressive safe product first. If it works, stop there.
Build your deep clean house plan
A deep clean house plan should match the way dirt moves. Dust falls, water drips, and people track grit from entries into living areas.
Use this order for most homes:
- Clear clutter and remove trash.
- Dust ceilings, vents, fans, shelves, blinds, and door tops.
- Vacuum dry debris from corners, baseboards, furniture edges, and tracks.
- Clean kitchens from appliances to counters to sink.
- Clean bathrooms from dry dust to wet fixtures to floors.
- Reset bedrooms, living areas, laundry, and soft surfaces.
- Clean floors last, working toward the exit.
Do one room at a time if you have a full day. If you are splitting the job over a few evenings, do dry dusting across the home first, then tackle wet rooms on separate days.
Step 1: clear clutter and stage the room
Deep cleaning slows down when every surface is covered. Start by removing items that do not belong in the room.
Use 3 piles: keep here, move elsewhere, and donate or toss. Do not spend the deep-cleaning day organizing every closet. That turns one job into three.
After the room is clear, pull small furniture 12-18 inches from the wall. Move rugs, trash cans, hampers, pet bowls, and counter items. Open windows if outdoor air is clean and the room needs ventilation.
This is also the time to look for trouble. Check under sinks, near toilets, around refrigerator lines, under potted plants, and at window tracks for damp spots.
Step 2: remove high dust before wet cleaning
Dry dust first. If you spray cleaner on dusty trim, you create streaks and paste.
Start above eye level:
- Ceiling fan blades
- Light fixtures and bulbs after they cool
- Air return grilles and vent covers
- Door tops and upper trim
- Tall shelves and cabinet tops
- Curtain rods and blinds
Use a vacuum brush for heavy dust, then a slightly damp microfiber cloth. Work slowly on fan blades so dust does not fling across the room.
Around Rocklin and Roseville, we see fine dust settle fast on fans and vents in dry months. If a vent cover looks gray after wiping, remove it if safe, wash it in warm soapy water, rinse, and dry it fully before reinstalling.
Step 3: reset kitchens without spreading grease
The kitchen usually takes the longest because grease catches dust. Start dry, then degrease.
First, clear counters and vacuum crumbs from drawers, cabinet corners, and the toe-kick area. Then wash upper cabinets, appliance fronts, backsplash, counters, sink, and lower cabinets.
For a heavier reset, book kitchen deep cleaning.
| Kitchen area | Deep-clean move | Pro detail |
|---|---|---|
| Cabinet fronts | Wipe handles, edges, and lower corners | Grease gathers where fingers pull |
| Countertops | Match cleaner to the material | Stone needs non-acidic care |
| Sink | Scrub basin, faucet base, drain rim, and sprayer | Use a detail brush around the faucet |
| Backsplash | Degrease behind the range first | Rinse so cleaner residue does not haze |
| Trash area | Wash can, wall marks, floor edge | Dry before adding a fresh liner |
| Small appliances | Wipe cords, feet, buttons, crumb trays | Unplug first |
Refrigerator
Remove expired food, then take out bins and shelves that are meant to come out. Let cold glass shelves warm before washing so sudden temperature change does not crack them.
Whirlpool’s refrigerator care guide recommends wiping the interior with warm water and dish soap, cleaning removable shelves and drawers in hot soapy water, and drying surfaces before reinstalling. Clean door seals with mild dish soap and water, then dry the folds so crumbs and moisture do not sit there.
Vacuum loose dust around accessible condenser coils with a soft brush attachment. If the refrigerator is built in or hard to move, do not force it.
Oven and range
Remove loose crumbs before you add any cleaner. For stuck-on oven soil, use the product made for your oven type and follow the label dwell time.
Avoid mixing degreasers, bleach, ammonia, vinegar, or oven cleaner. Use one product, rinse as directed, and ventilate the kitchen.
If the oven, refrigerator, or range hood needs a detail pass, oven and refrigerator cleaning is the cleaner add-on than trying to rush it at the end of a full house day.
Step 4: scrub bathrooms in the right order
Bathrooms look small, but they hold mineral scale, soap film, hair, body oil, and moisture. In Greater Sacramento, hard water often leaves shower glass and faucet edges looking cloudy even after a quick clean.
Start with dry work. Vacuum hair and dust from corners, baseboards, exhaust fan covers, drawer interiors, and behind the toilet. Then move to wet cleaning.
Clean in this order:
- Mirrors, lights, and high shelves
- Sink, faucet, counter, and vanity fronts
- Shower walls, tub, door tracks, and grout lines
- Toilet exterior, seat hinges, bowl, and base
- Floor edges and the full bathroom floor
Let cleaners dwell according to the label. Dwell time means the surface stays wet long enough for the product to work. Rushing this step is why soap scum and disinfectant jobs fail.
For everyday homes, the same home-cleaning guidance says surfaces should be cleaned before any sanitizing or disinfecting, and disinfectant should stay wet for the product’s stated contact time. That means you wipe away dirt first, then disinfect high-touch points only when needed.
Mold and mildew checks
Do not ignore black, green, pink, or fuzzy growth. Color alone does not tell you the risk, but moisture does.
EPA’s mold guide uses less than about 10 square feet, roughly a 3-foot by 3-foot patch, as the common DIY cutoff for many small hard-surface mold jobs. Larger areas, porous materials, HVAC concerns, sewage water, or recurring growth need a qualified mold professional.
For small hard-surface spots, scrub with detergent and water, dry completely, and fix the moisture source. If you are unsure what you are seeing, our mold vs. mildew guide shows how to compare texture, location, smell, and moisture source before you scrub.
Step 5: reset bedrooms and living areas
Bedrooms and living areas collect dust in layers. Start with the things people rarely move.
Dust lampshades, headboards, picture frames, window sills, blinds, TV backs, table legs, outlet covers, switch plates, and baseboards. Vacuum window tracks with a crevice tool, then wipe the channel with a damp cloth — tracks collect the grit that scratches sills when windows slide. Vacuum under beds, sofas, nightstands, media consoles, and chair cushions.
Wash bedding, throws, and removable cushion covers according to the fabric label. For items that cannot be washed, vacuum slowly with an upholstery tool.
Use this soft-surface pass:
| Item | What to do | Watch for |
|---|---|---|
| Mattress | Vacuum top, sides, seams, and frame edge | Moisture, stains, odor |
| Sofa | Remove cushions and vacuum cracks | Coins, crumbs, pet hair |
| Curtains | Vacuum or launder by care label | Dust at pleats and hems |
| Rugs | Vacuum both directions | Grit under edges |
| Closet floor | Remove items and vacuum baseboards | Dampness near exterior walls |
If pet hair, dust, or odors stay in fabric after vacuuming, dedicated upholstery cleaning may be the better next step.
Step 6: laundry room, entry, and hallways
These three zones are where deep cleans quietly fail, because they are pass-through spaces nobody “owns.” They also feed dirt to every other room, so cleaning them protects the work you just did.
Laundry room. Start with the dryer. Empty the lint trap, then vacuum the trap slot itself with a crevice tool — lint packs below where the screen reaches. Vacuum the floor gap behind and beside the machines; lint, dryer sheets, and socks collect there and hold dust. Wipe the washer’s door gasket folds with a damp cloth and dry them, then pull the detergent drawer and rinse residue in the sink. Leave the washer door and drawer open to air out. Wipe machine tops, control panels, and the supply hoses’ visible run. If the room has a utility sink, scrub the basin and faucet base — it is usually the dirtiest sink in the house because it only sees dirty jobs.
Entry. Shake or vacuum both sides of every mat, then vacuum the threshold channel where grit collects. Wipe the door glass, handle, deadbolt, and the door’s lower kick area. Clear the shoe zone, vacuum the corners behind it, and wipe baseboards — entry baseboards take the most scuffs in the house. In dry Sacramento months, this is the room to repeat between deep cleans: driveway grit and oak pollen enter here first, and a clean mat line keeps them off the floors you just mopped.
Hallways. Halls collect fingerprints at shoulder height and dust at floor level, and almost nothing in between. Wipe switch plates, stair rails, and door frames, then dust vent covers and any picture frames. Spot-clean wall scuffs with a barely damp cloth and mild soap, testing flat paint in a low corner first — flat finishes can burnish if rubbed hard. Finish by vacuuming the hall floor edges so the final floor pass in the next step goes fast.
If a zone fails the hand-swipe test after one pass, note it for the next visit instead of re-cleaning the whole room. Deep cleaning improves in cycles, and these small rooms respond fastest.
Step 7: clean floors and baseboards last
Floors should be last because every other task drops dust. Start by vacuuming or sweeping dry debris, then detail edges and baseboards. Most of that baseboard pass can be done on your feet, using the standing method for cleaning baseboards.
For hard floors, mop with a damp pad, not a soaking one. Change water when it turns cloudy. Dirty mop water moves soil around and leaves a dull film.
For hardwood, use a cleaner made for the finish and keep liquid light. Standing water can swell seams and dull the finish, especially near patio doors and kitchens.
Our hardwood floor cleaning service is a good fit when the floor is sealed but dull, sticky, or marked by traffic lanes. If the finish is worn through, cleaning cannot replace sanding or refinishing.
For carpet, vacuum slowly in overlapping passes. Use a crevice tool at baseboards and door thresholds where dust packs in.
Step 8: check high-touch points and dry zones
The last pass is small but important. Clean the touch points that hands hit all day.
Check:
- Doorknobs and deadbolts
- Light switches
- Cabinet pulls
- Faucet handles
- Appliance handles
- Stair rails
- Remote controls
- Thermostats
- Toilet flush handles
- Trash can lids
Clean first. Disinfect after illness, raw meat contact, bathroom accidents, or when a household member is at higher risk.
Never mix cleaning products. If one product fails, rinse, dry, ventilate, and switch only after the first product is gone.
Before you call the room done, run your hand along baseboards, look behind doors, and check that wet areas are dry. Federal mold guidance treats moisture control as the key to mold control, so drying is part of cleaning.
Room-by-room deep cleaning checklist
Use this as your working list. Finish one room, then reset your tools before moving on. For a printable task-level version, use our room-by-room house cleaning checklist.
| Room | Must-do tasks | Detail most people miss |
|---|---|---|
| Kitchen | Cabinets, counters, sink, appliance fronts, backsplash, trash area | Greasy cabinet tops and toe kicks |
| Bathroom | Fan cover, vanity, sink, shower, tub, toilet, floor | Toilet base and shower door tracks |
| Bedroom | Bedding, lamps, blinds, baseboards, under-bed dust | Headboard and mattress seams |
| Living room | Upholstery, media area, tables, windows, baseboards | Remote controls and sofa cracks |
| Laundry room | Machines, lint area, shelves, sink, floor | Dust behind machines |
| Entry | Door glass, handles, mats, shoe area, thresholds | Grit under mats |
| Hallways | Switches, rails, vents, trim, floors | Fingerprints at shoulder height |
Keep a clean cloth for the final dry pass. Drying removes streaks and catches residue before it hardens.
When should you book a professional deep clean?
Book help when the job is bigger than the time you have, or when the home needs a reset before guests, photos, move-in, move-out, a baby, or a lease turnover.
Call a pro sooner when you see:
- Heavy grease on cabinets, range hood, or oven area
- Soap scum that needs repeated dwell and scrub cycles
- Sticky floors after mopping
- Dust packed into vents, blinds, and baseboards
- Pet hair in upholstery and floor edges
- Recurring moisture, mildew, or musty odor
- A home that has been vacant or under renovation
Elite House Cleaning serves Rocklin, Roseville, Sacramento, Folsom, Elk Grove, Granite Bay, Lincoln, and nearby Greater Sacramento homes. Our cleaners are background-checked and insured, and eco-friendly non-toxic products are standard.
A simple finish line
Deep cleaning works best when you stop trying to do every task at once. Follow the same route every time: clear, dust, vacuum edges, wash details, handle kitchens and baths, refresh fabrics, then clean floors.
If you are learning how to deep clean a house for a one-time reset, follow the top-to-bottom order and keep each room dry before moving on. If you want the house reset without giving up the weekend, get a free estimate.